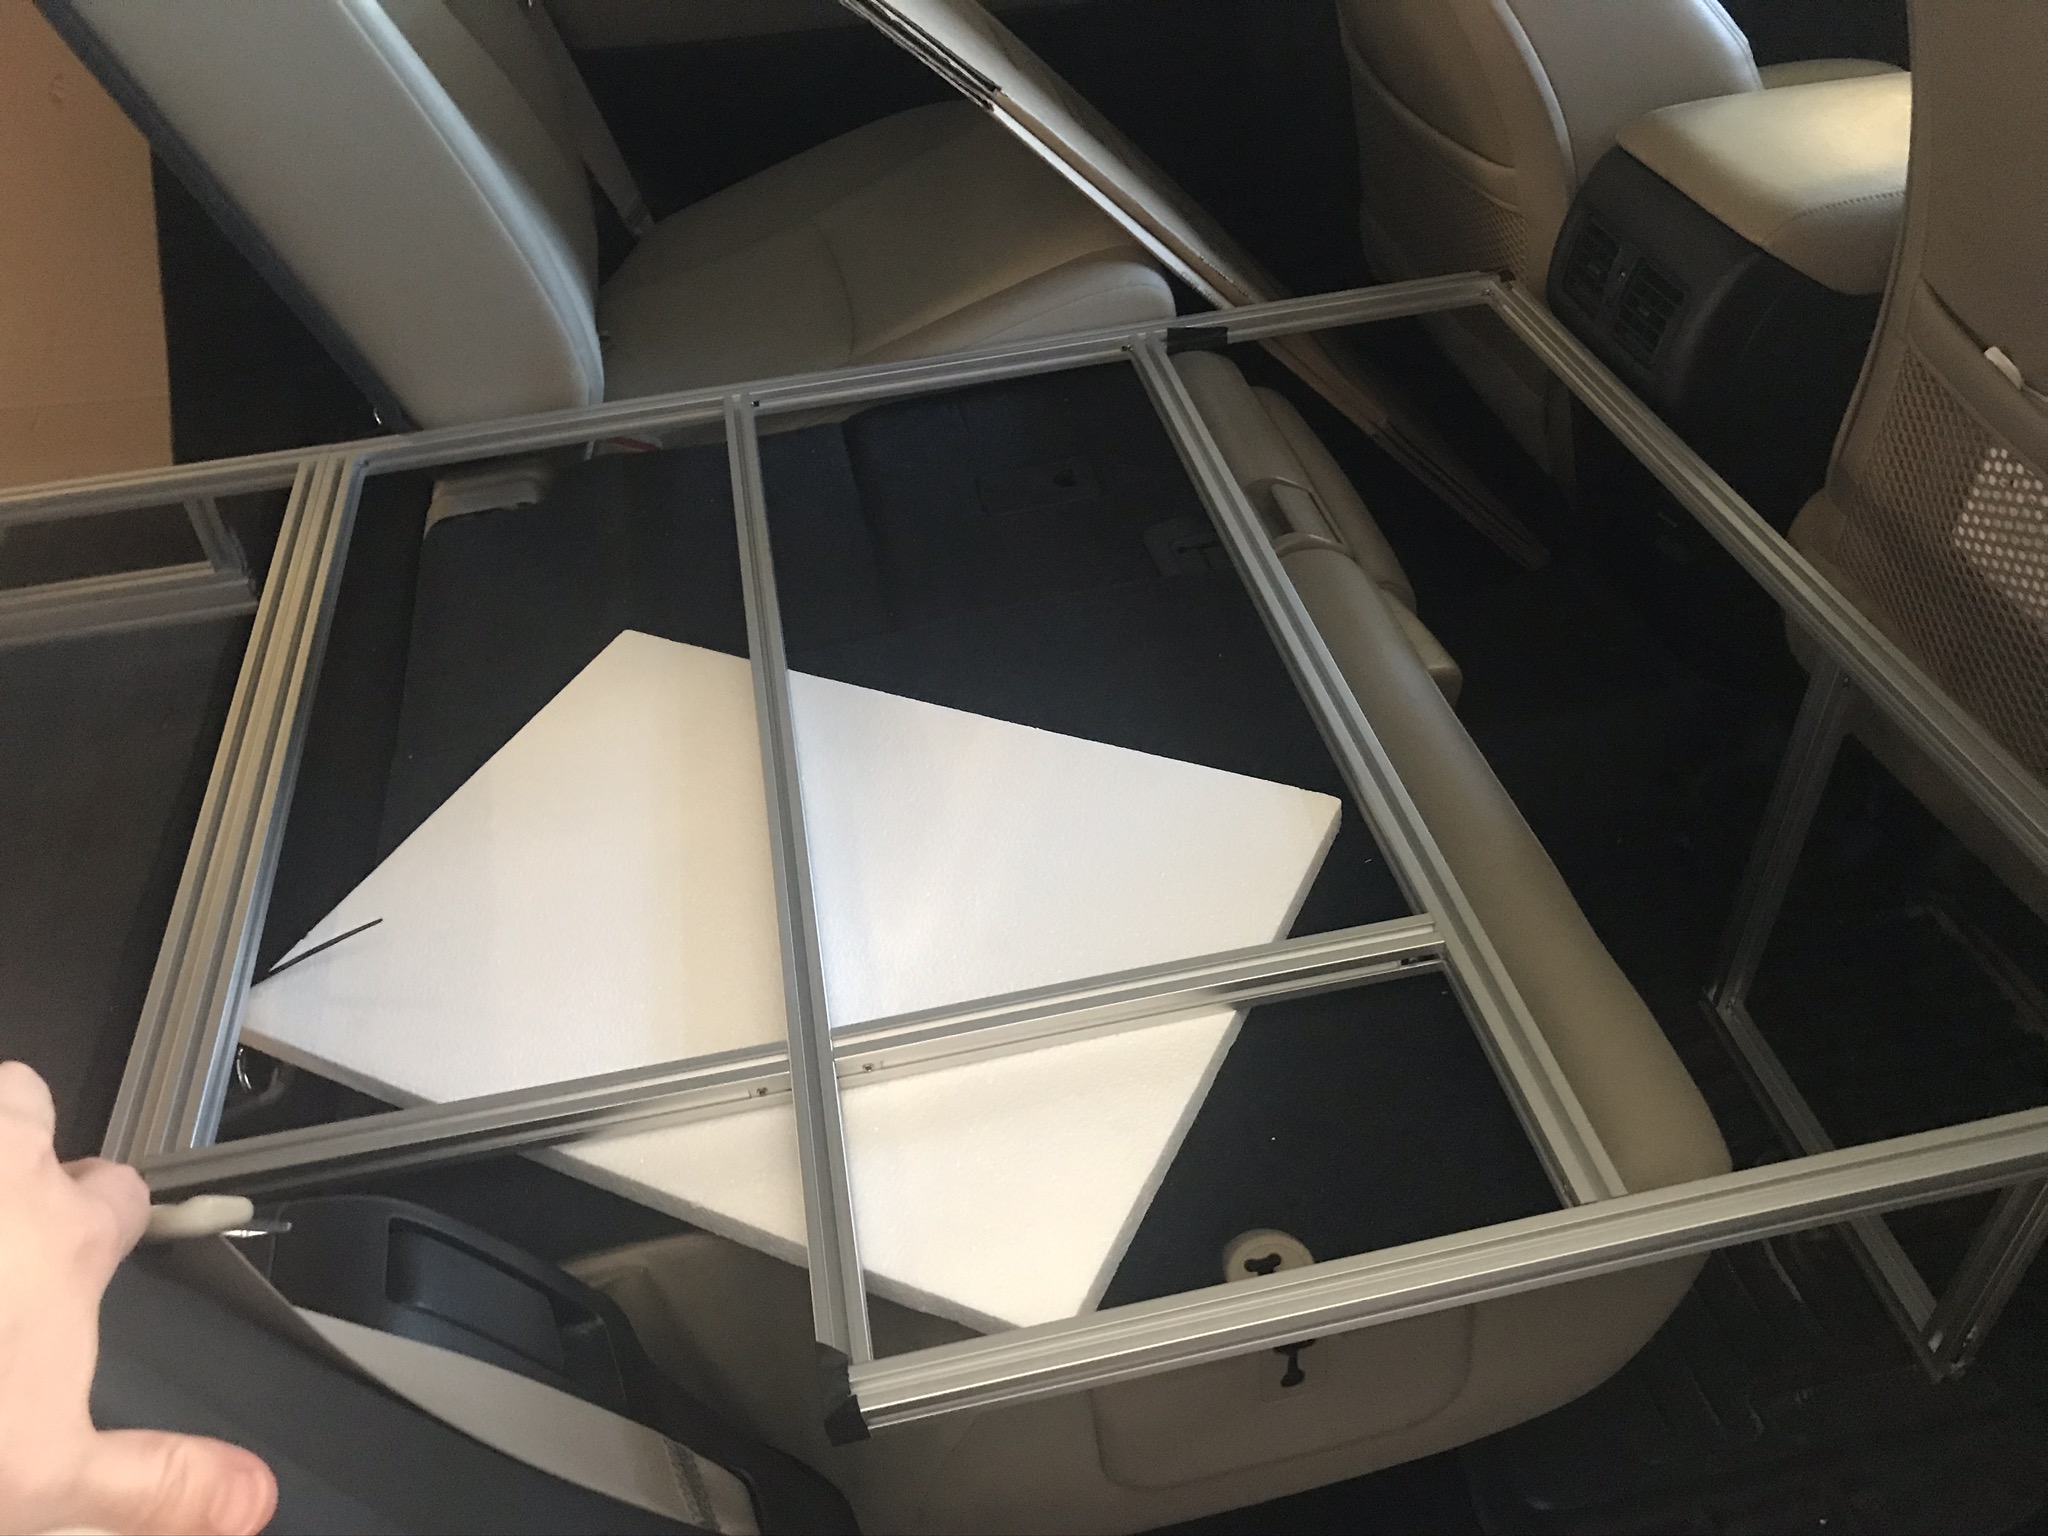
4Runner Sleeping Platform
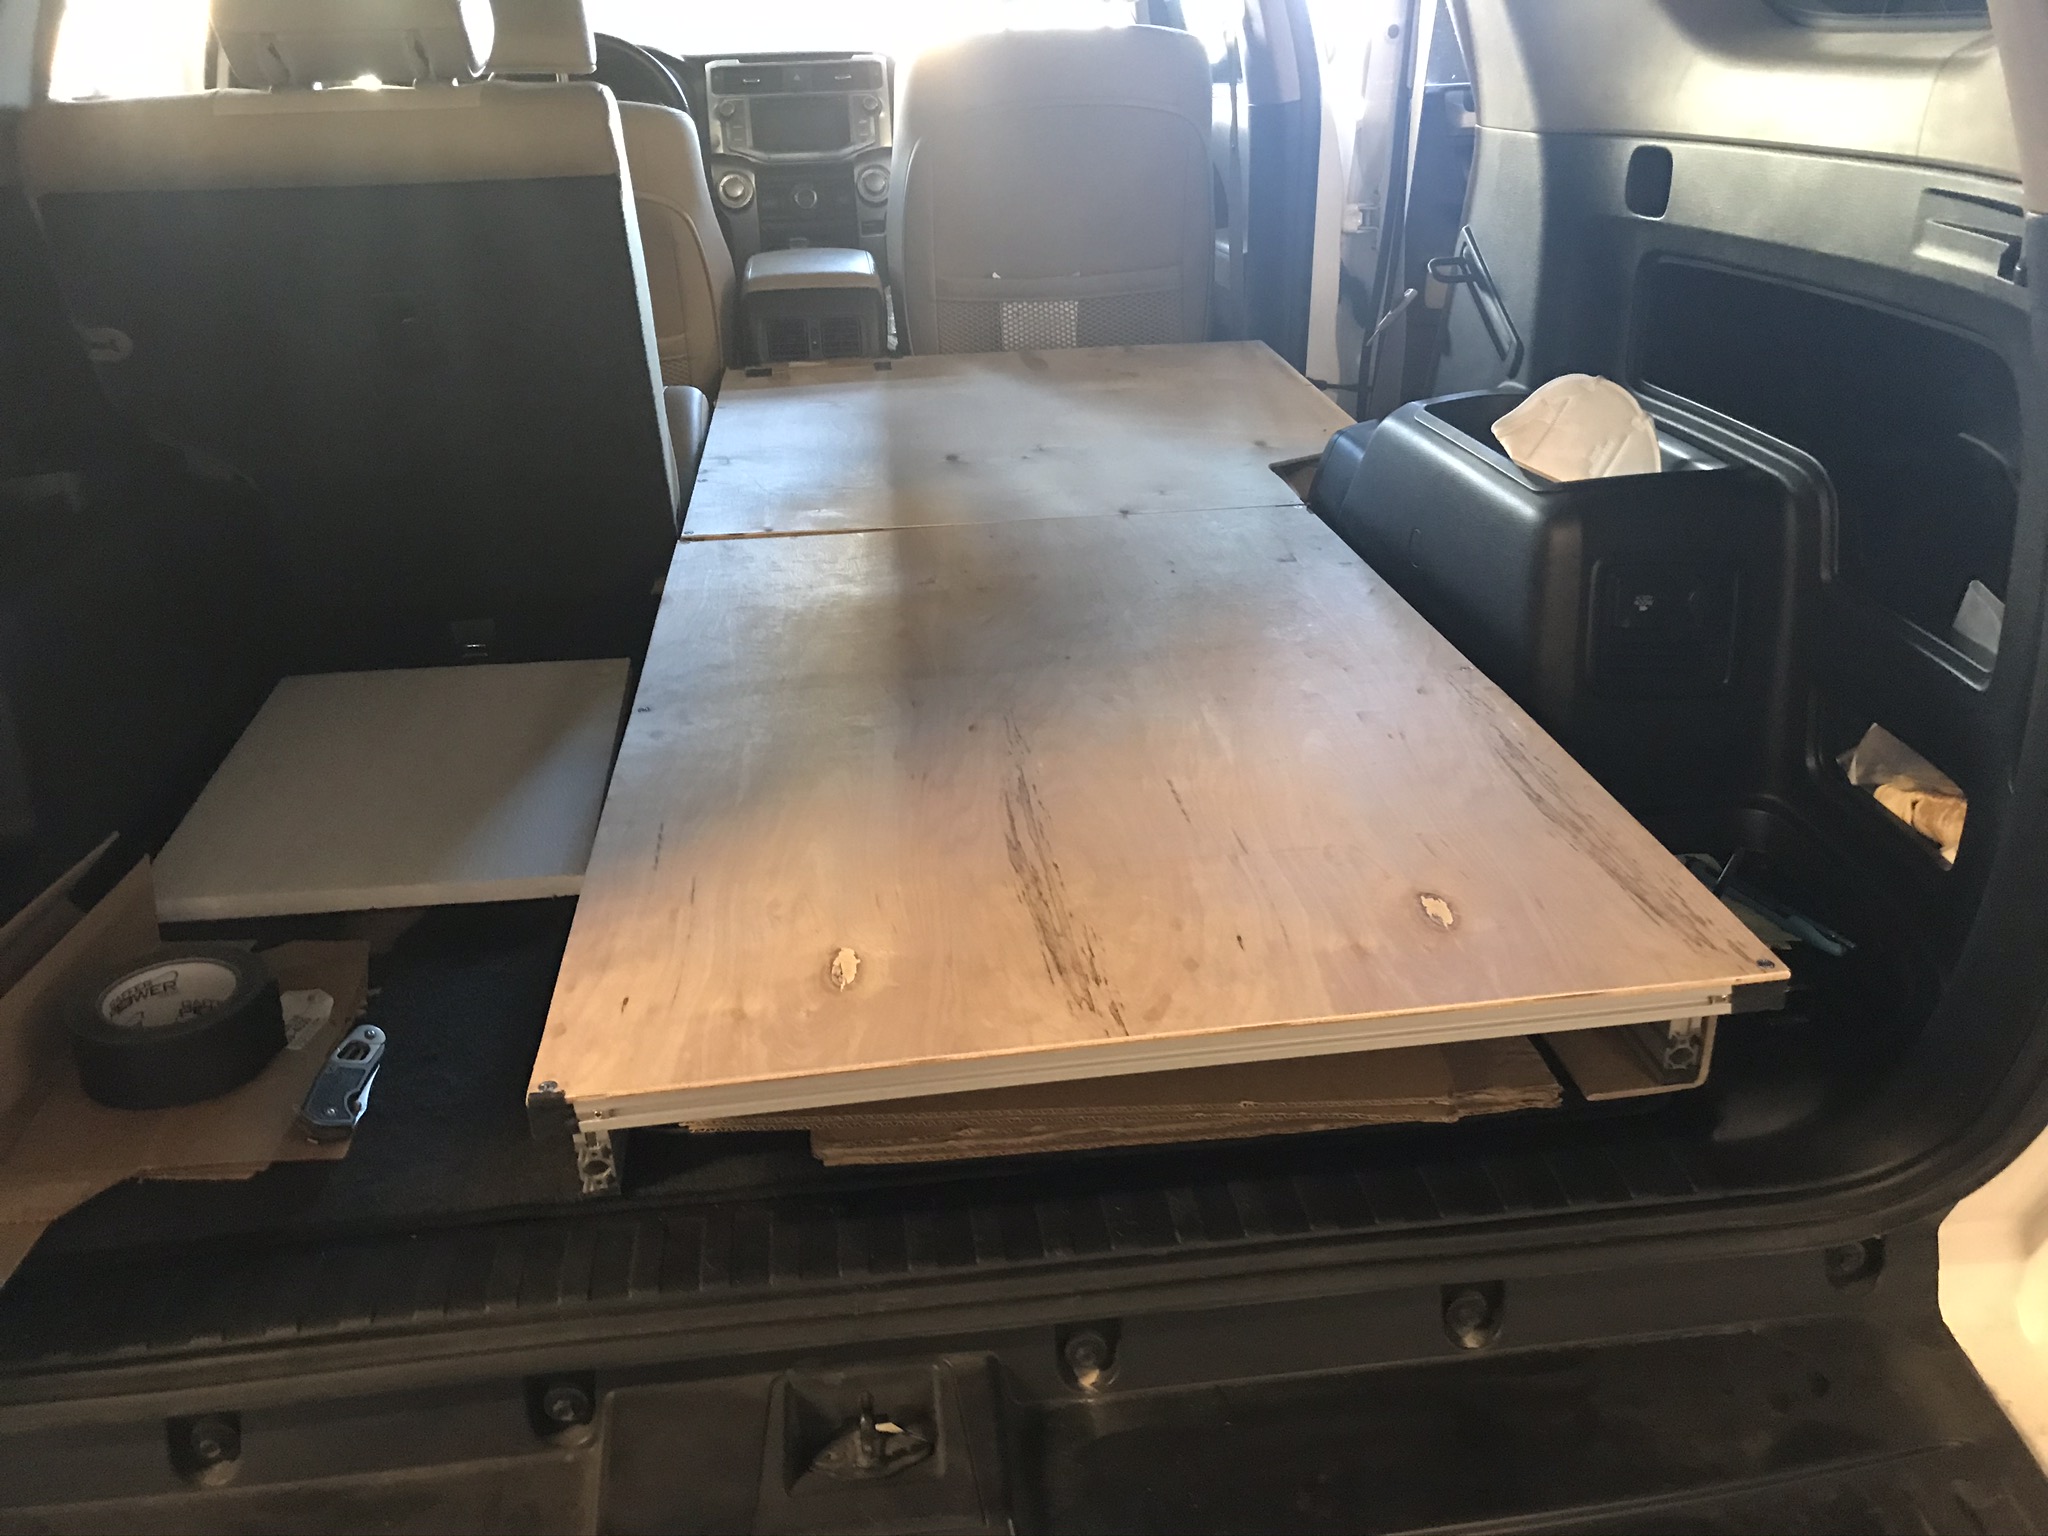 Above: The platfrom from the tailgate
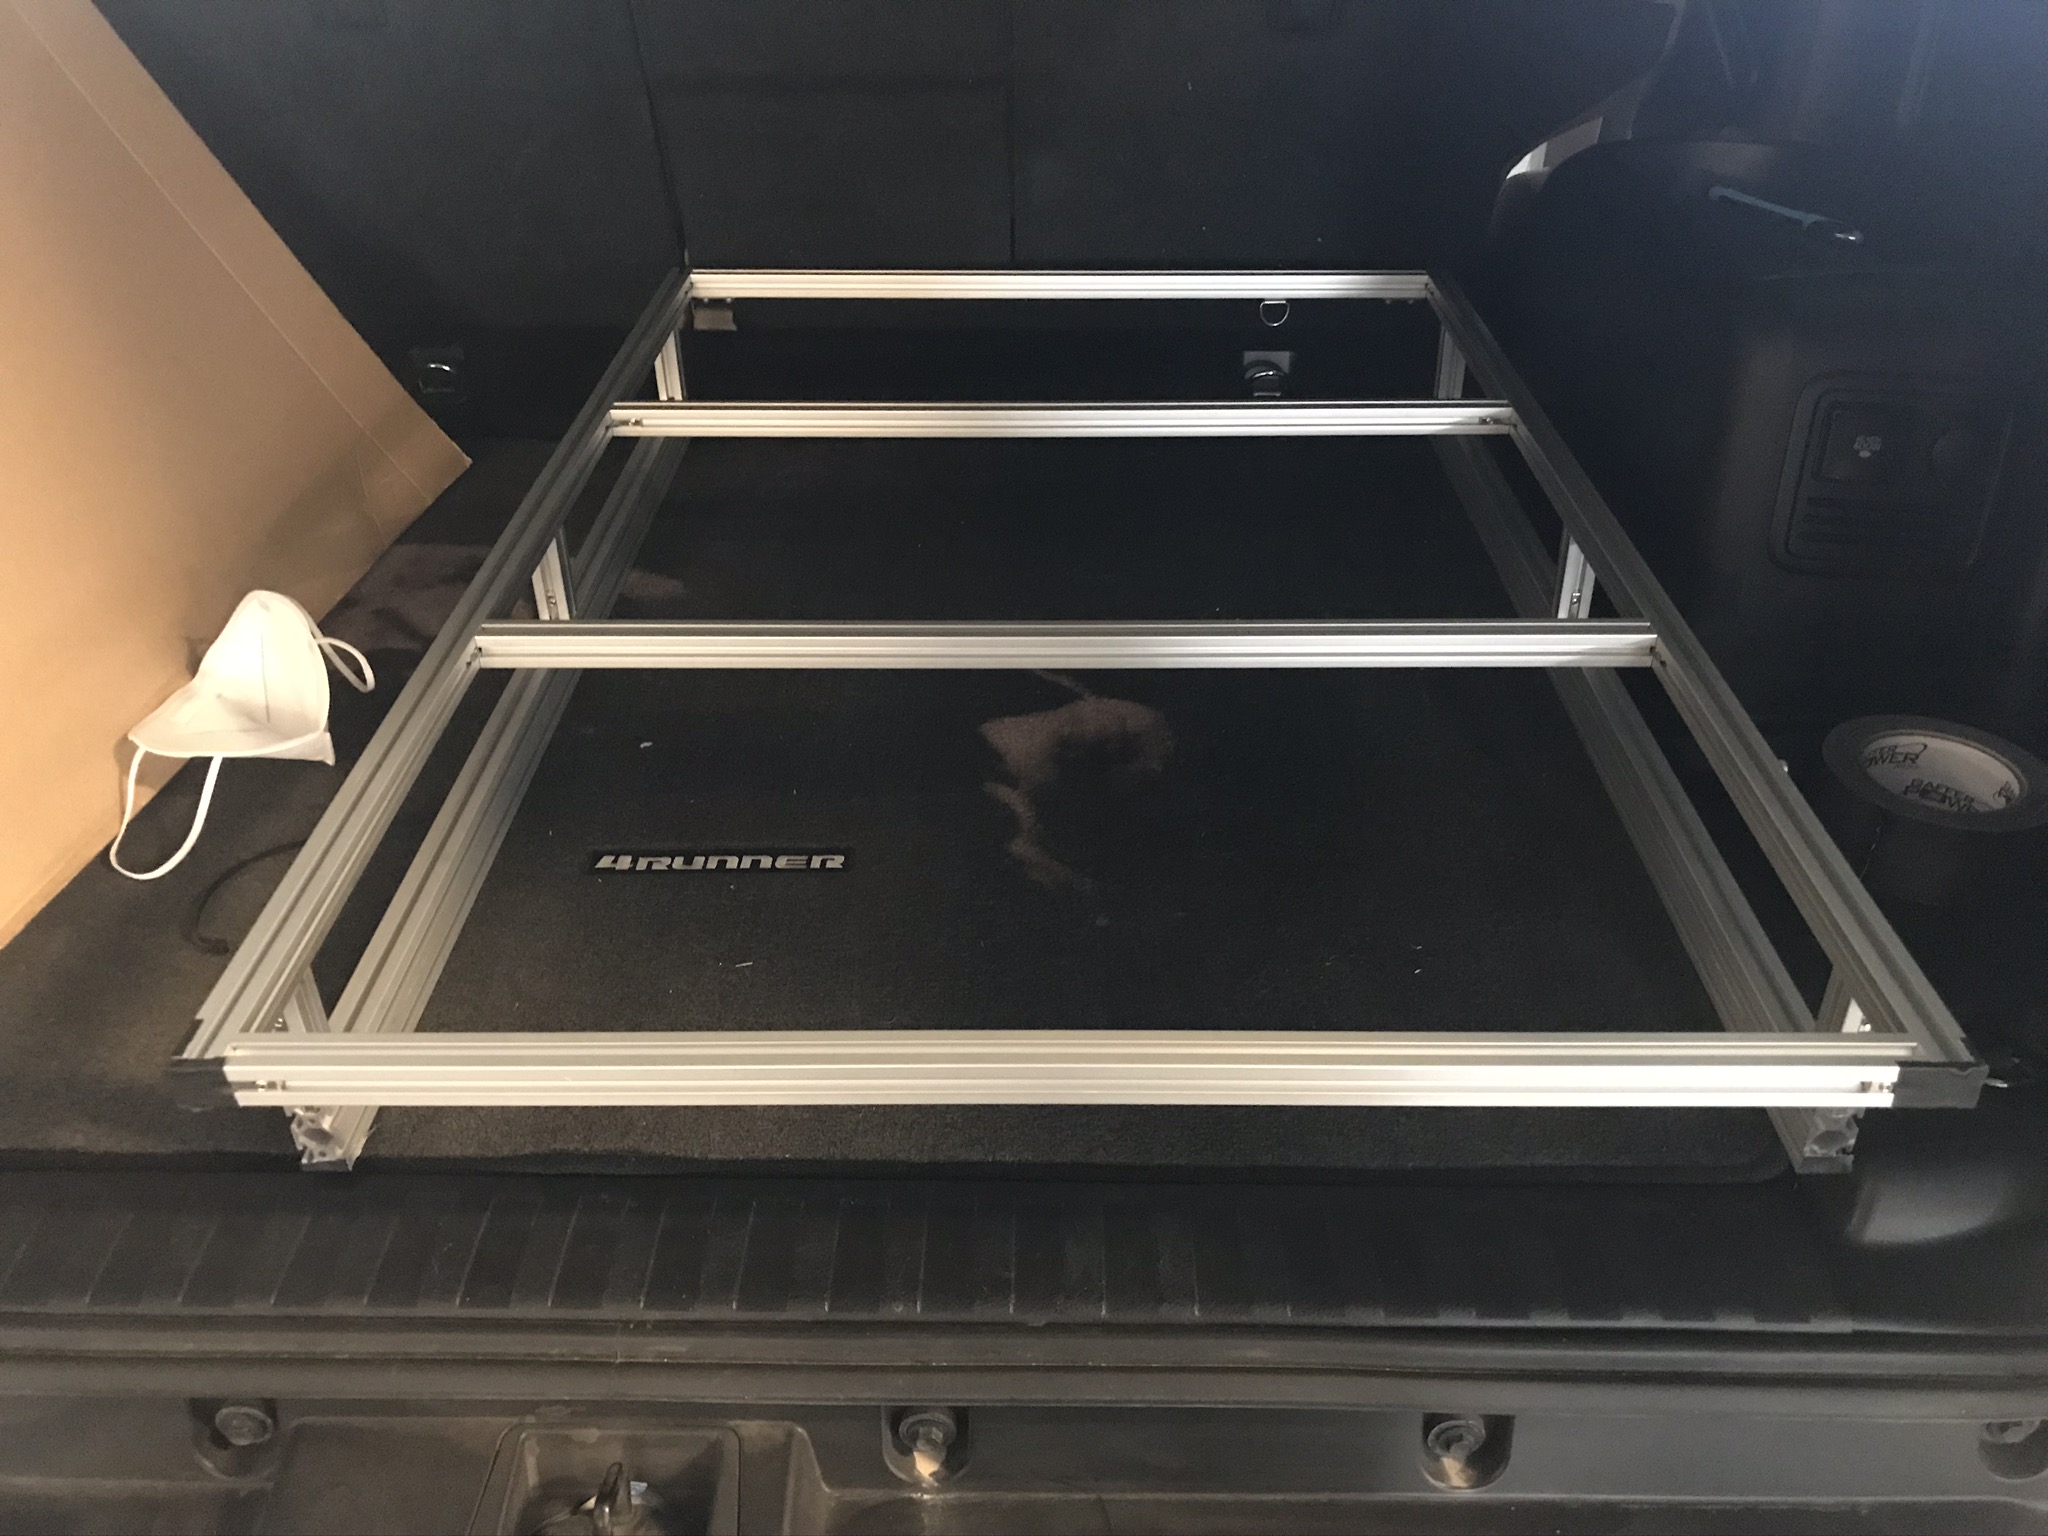
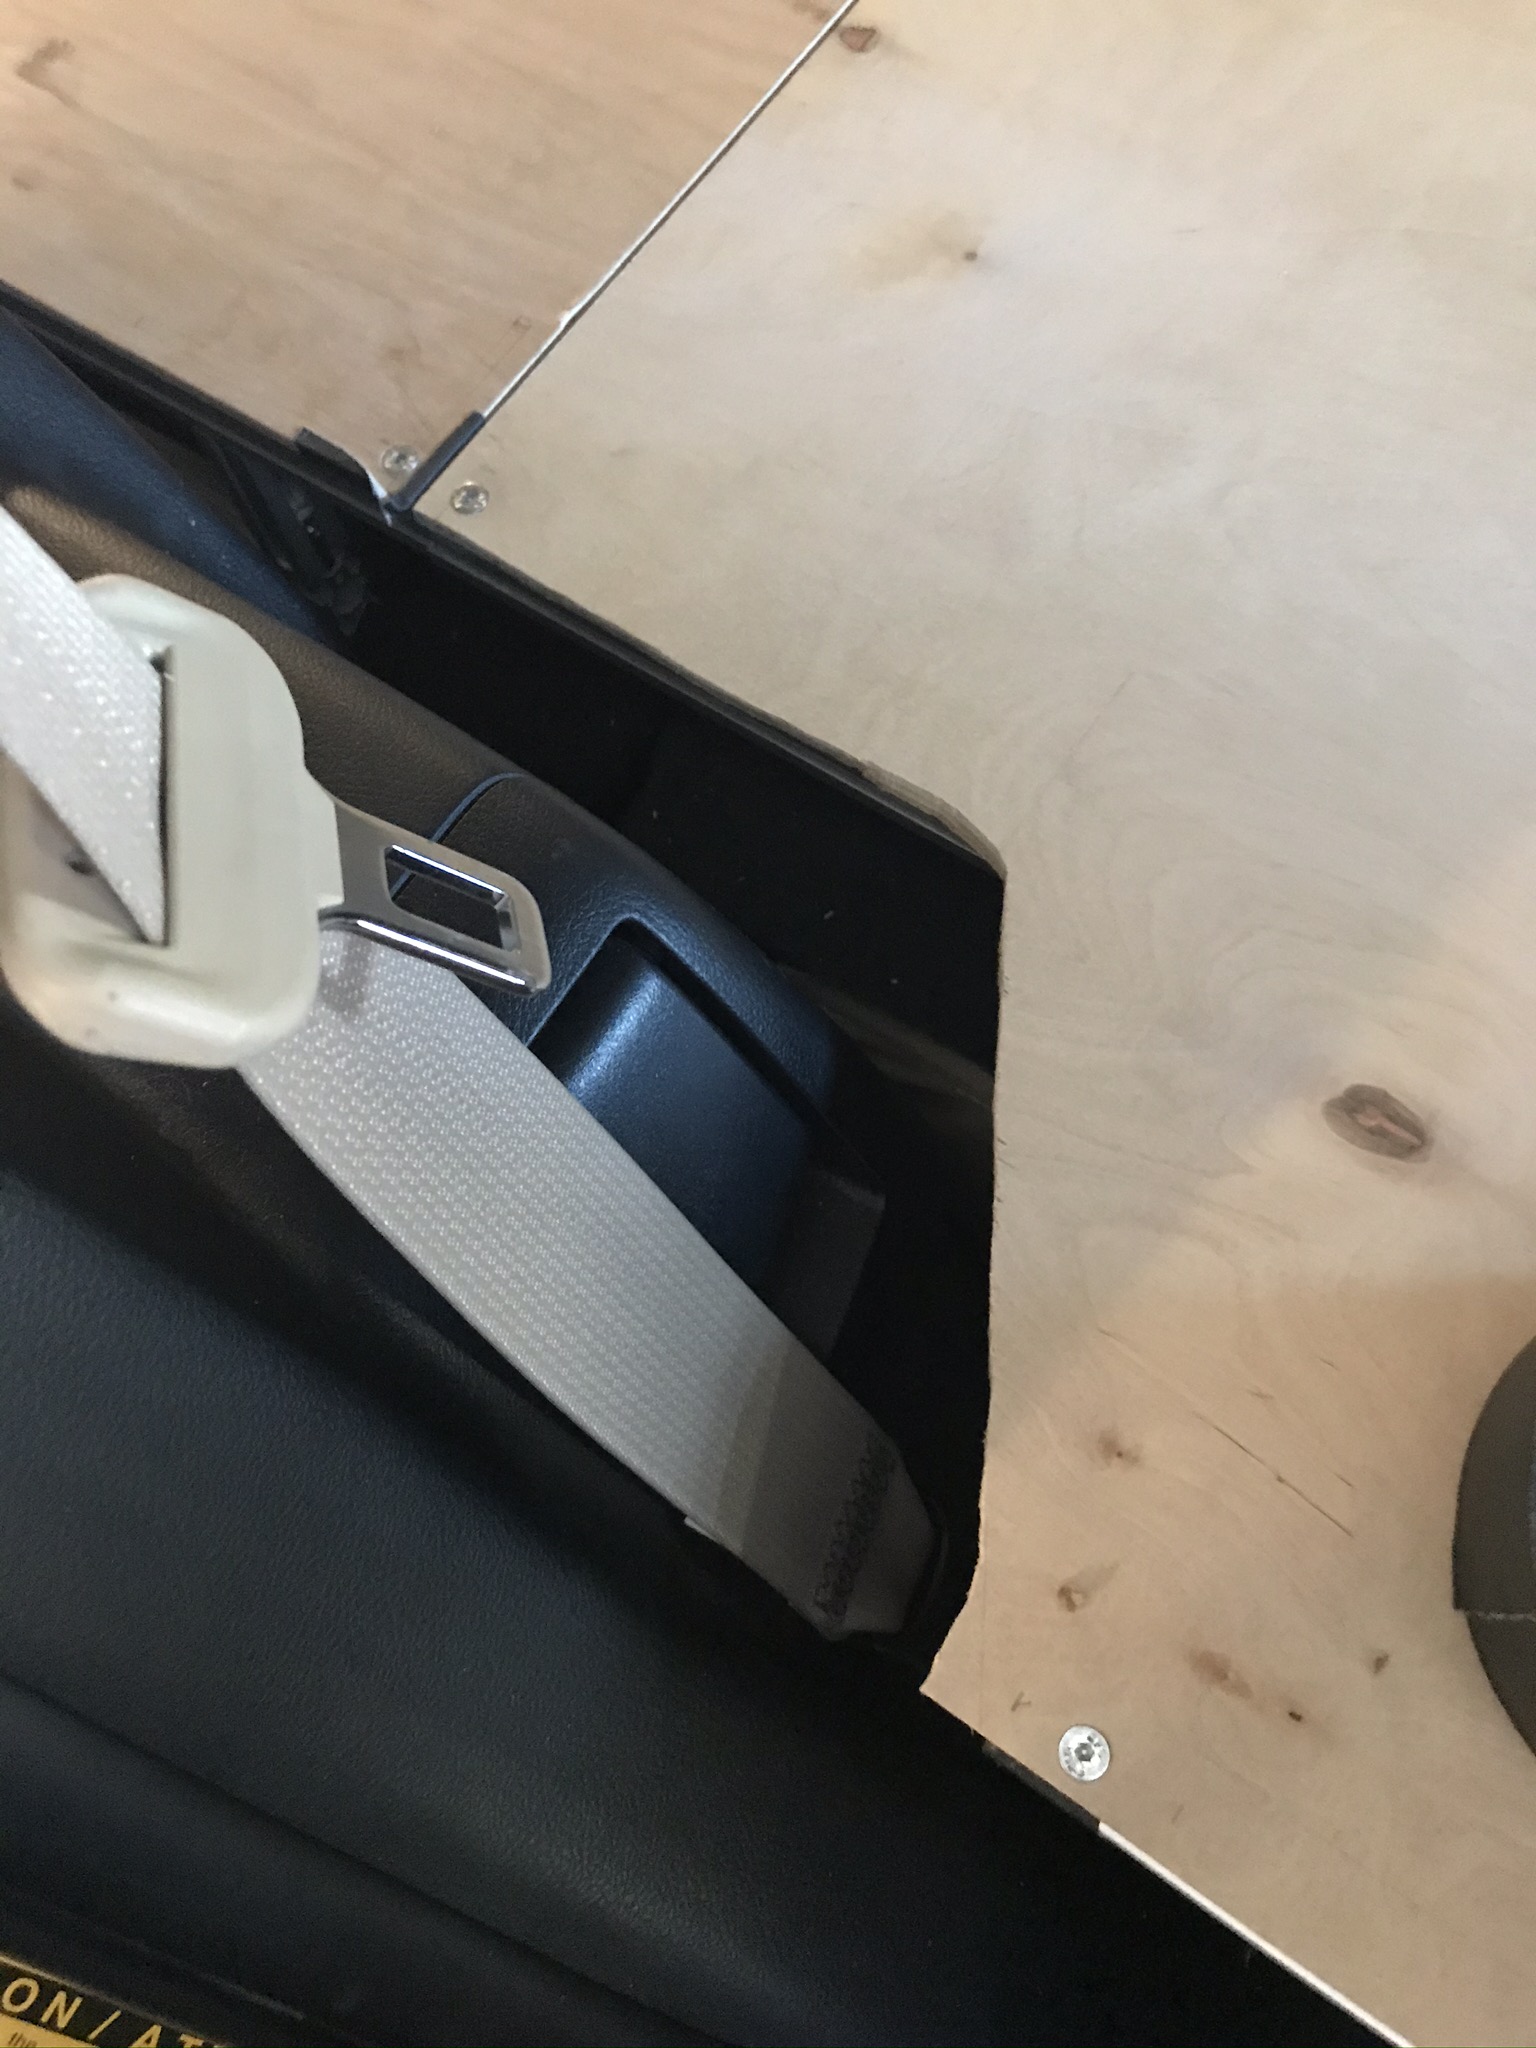 Above: The platform widens in the 2nd row area
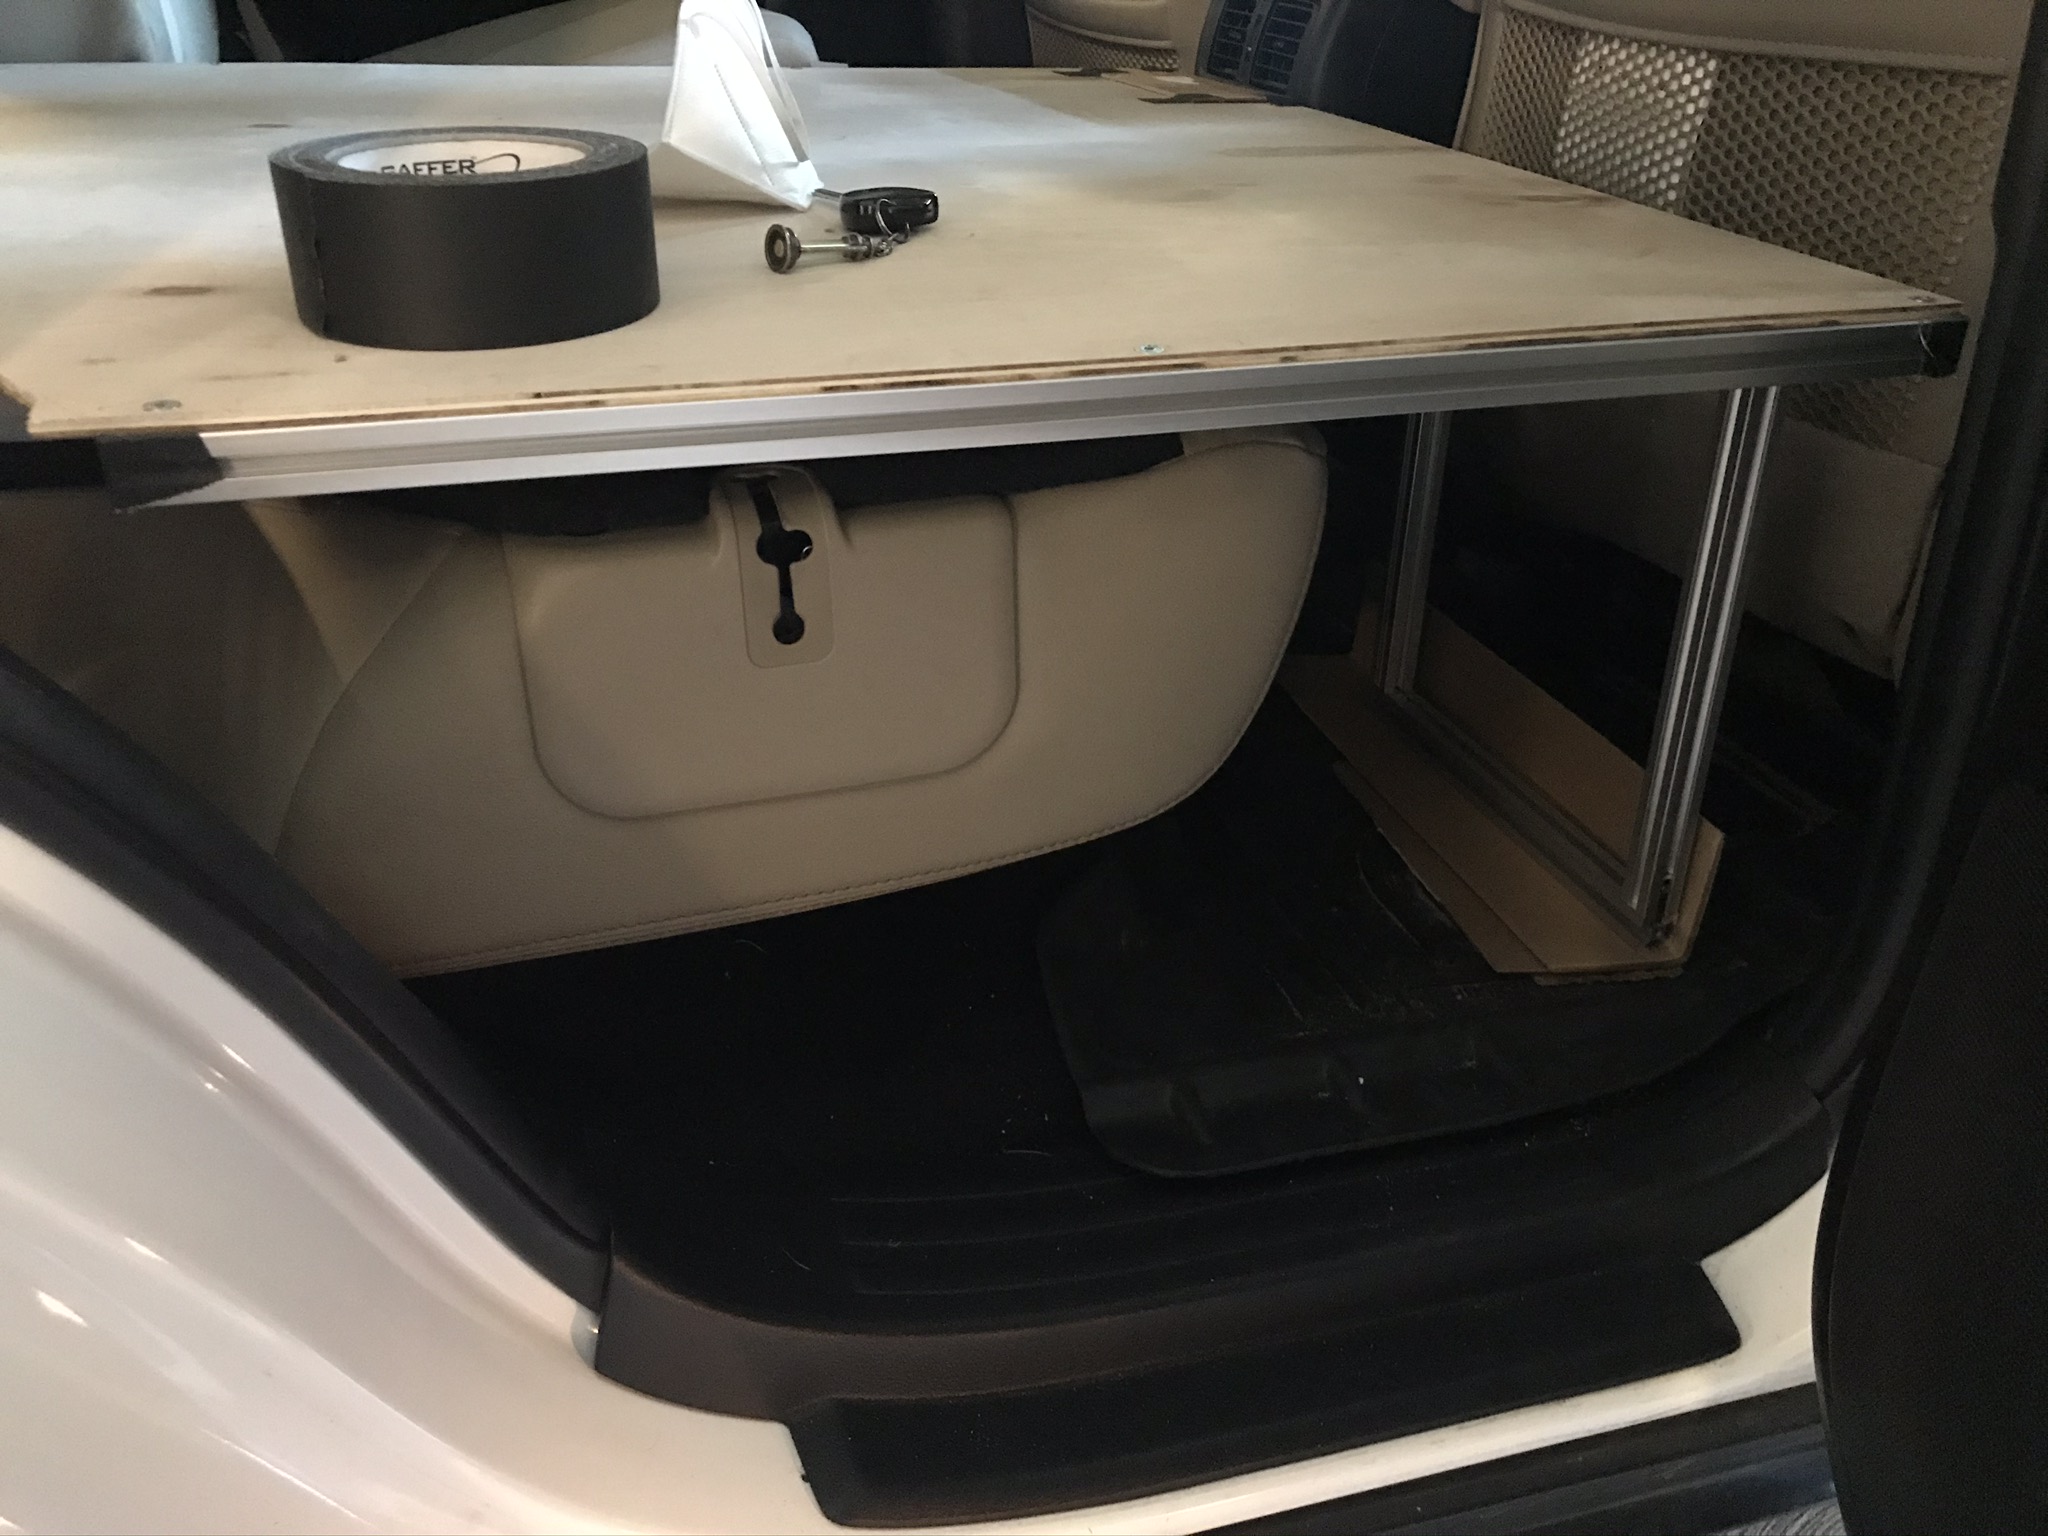 Above: The front section is supported by a U-shaped leg.
V2 adds an additional crossbar to allow repositioning of the legs.
Above: The front section is supported by a U-shaped leg.
V2 adds an additional crossbar to allow repositioning of the legs.
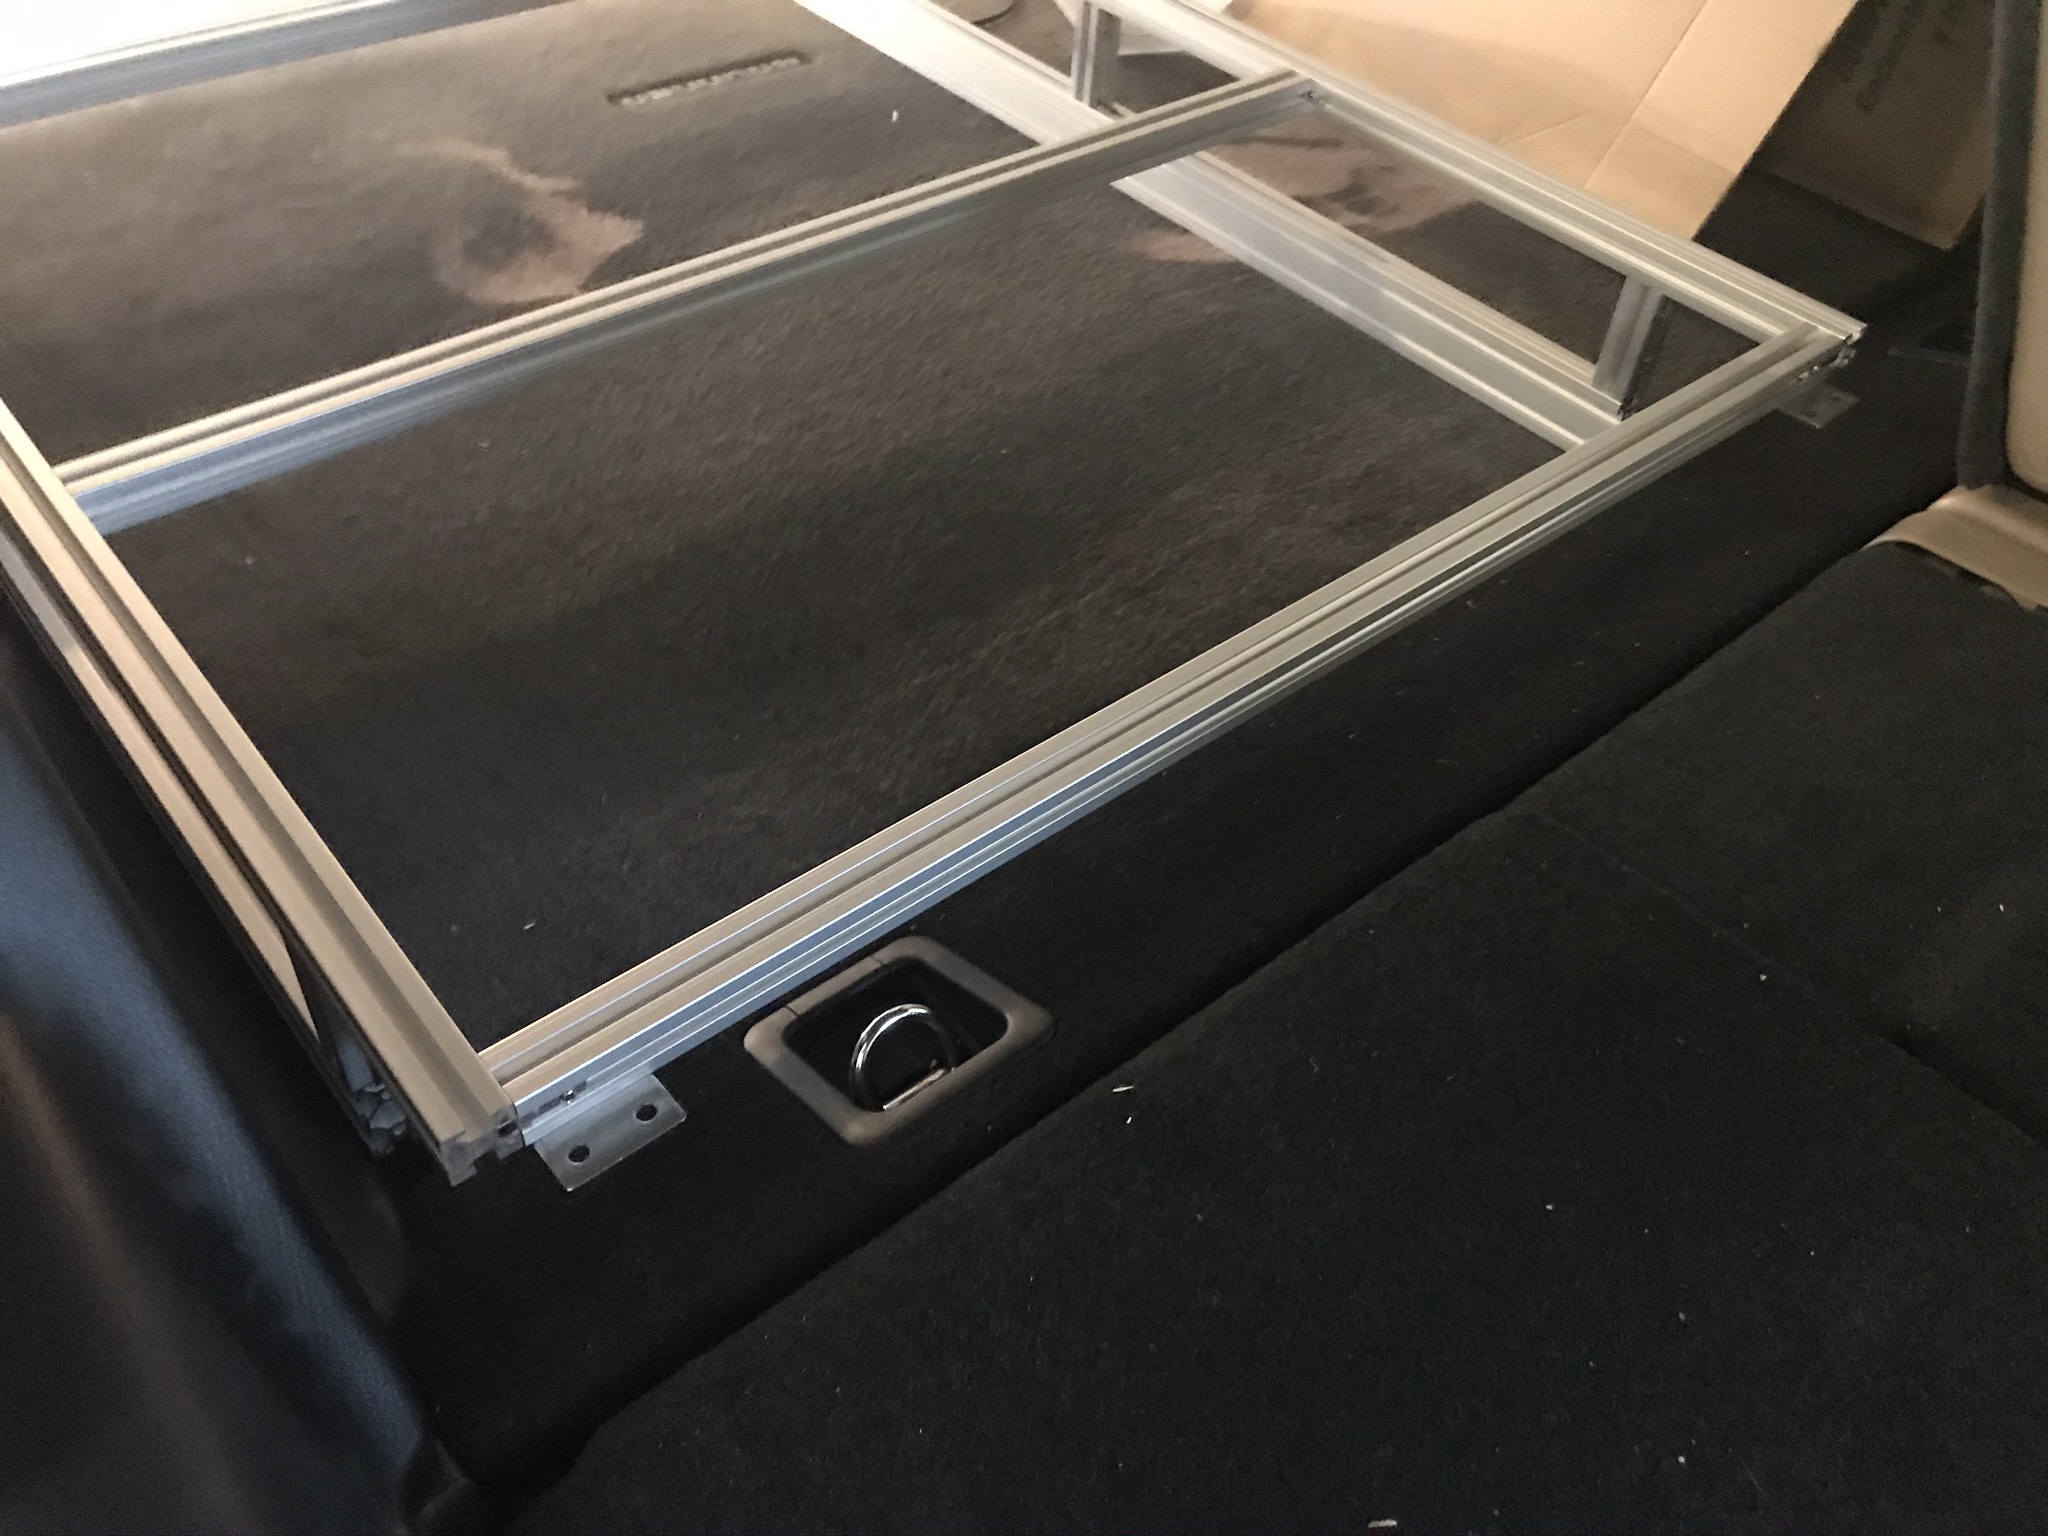
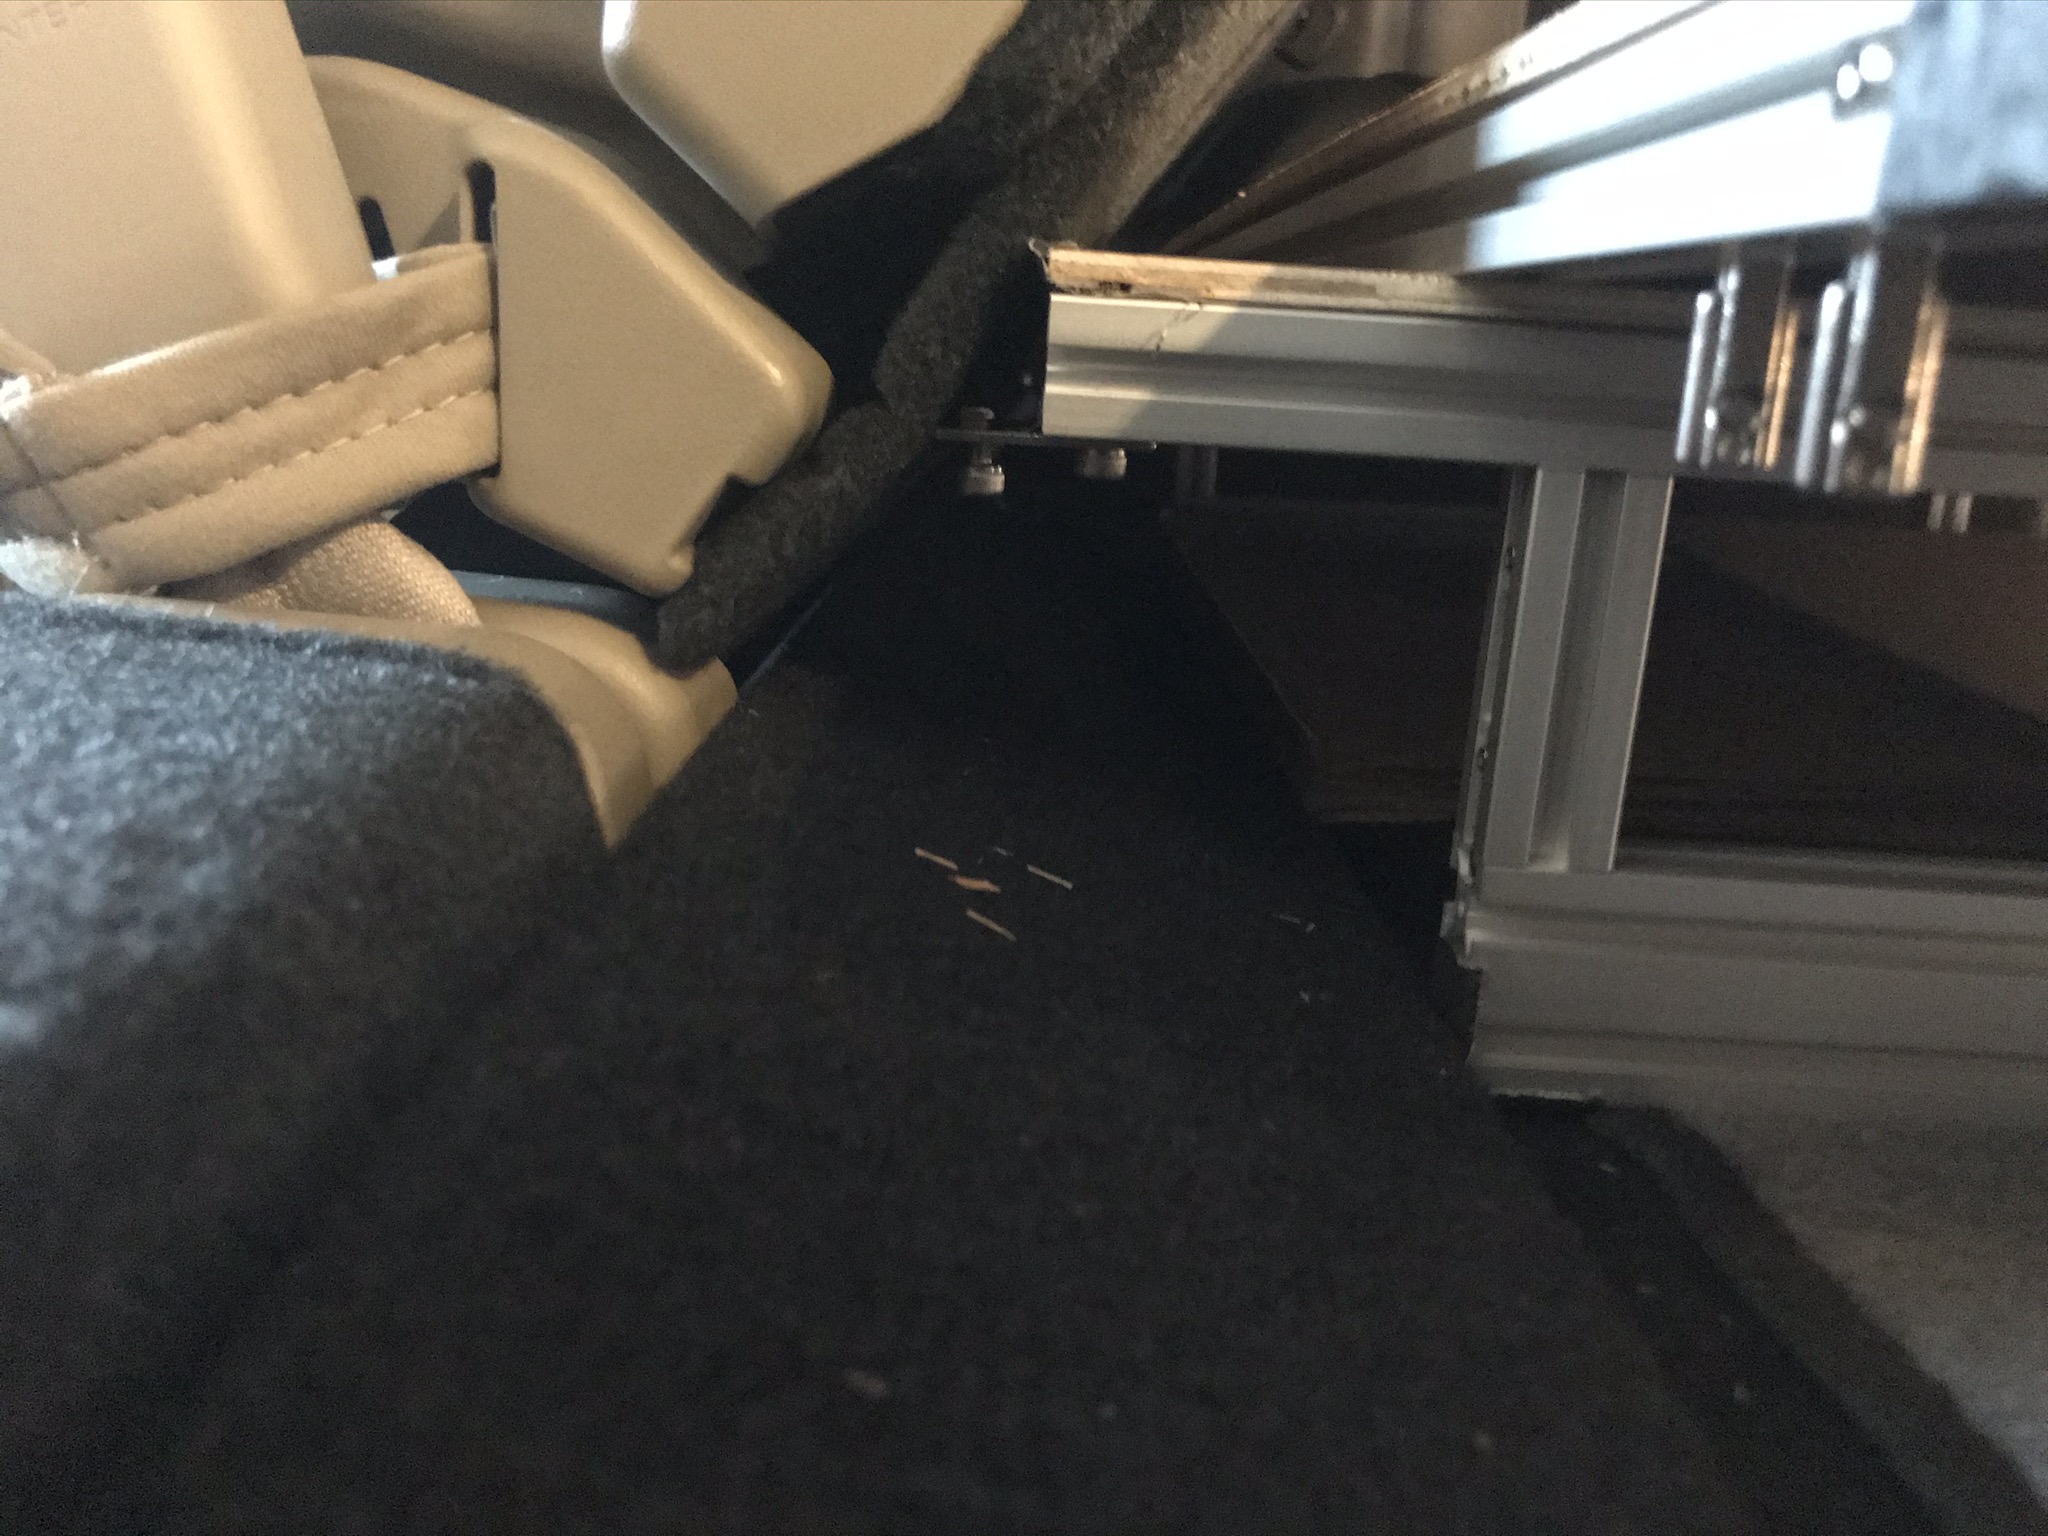 Above: The rear section fits even with the 2nd row seat up.
In this photo, the seat is fully reclined.
Above: The rear section fits even with the 2nd row seat up.
In this photo, the seat is fully reclined.
First, a disclaimer: Modifying your vehicle can be dangerous to you or your vehicle or its occupants.
I make no warranties as to the accuracy, completeness, or safety of this page's contents.
This is still a work-in-progress.
I live downtown, and park in tight garages, so a 4Runner is about the largest vehicle I can own.
I wanted the flexibility of camping without having to set up a tent. But the low-clearance also means I can't leave a rooftop tent in place.
So I decided to build a platform to level the cargo area of the truck.
The dead-simple solution is a piece of plywood with 2x4s to level the rear with the 2nd row seatbacks.
The 'extra' solution is a tall drawer system with a platform to clear the folded seat bottoms.
One of my considerations was keeping as much vertical room as possible, so I took a hybrid approach of removing the 60% rear seat bottom.
This gives me three usable seats in the vehicle, and sleeping for one.
This design is for a 5th Gen 4Runner (2010-2020), with no 3rd row and no sliding tray.
I used 20mm profile aluminum extrusion for the frame, and 5mm plywood for the top surface (floor underlay).
Here are some simple sketches of the extrusion:
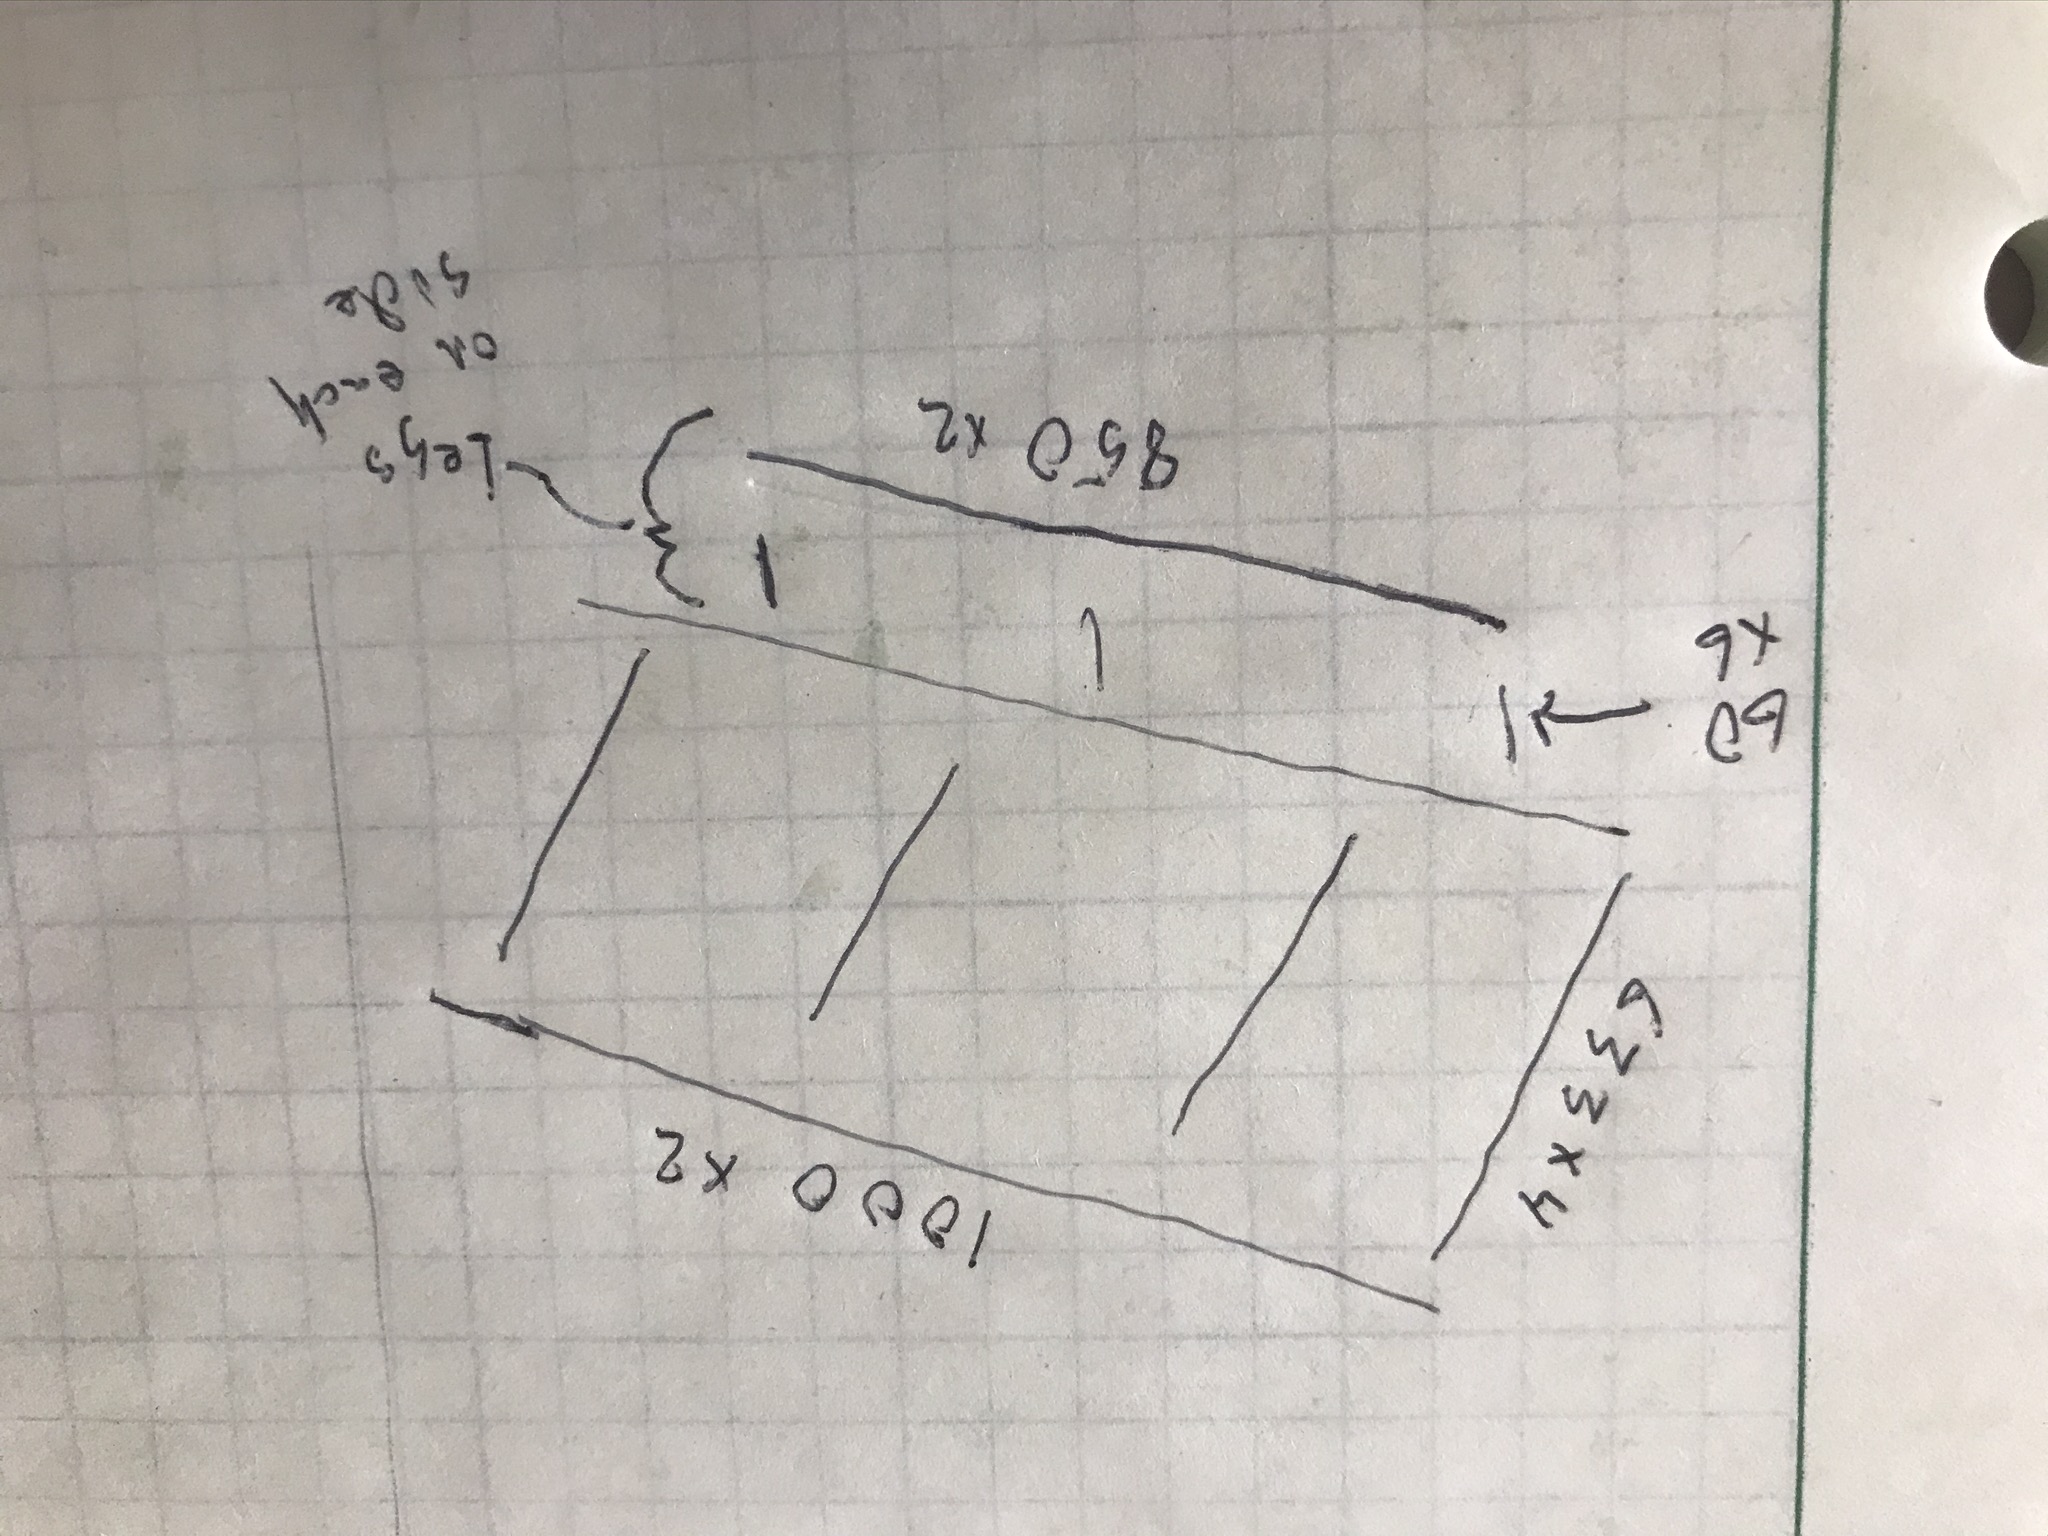
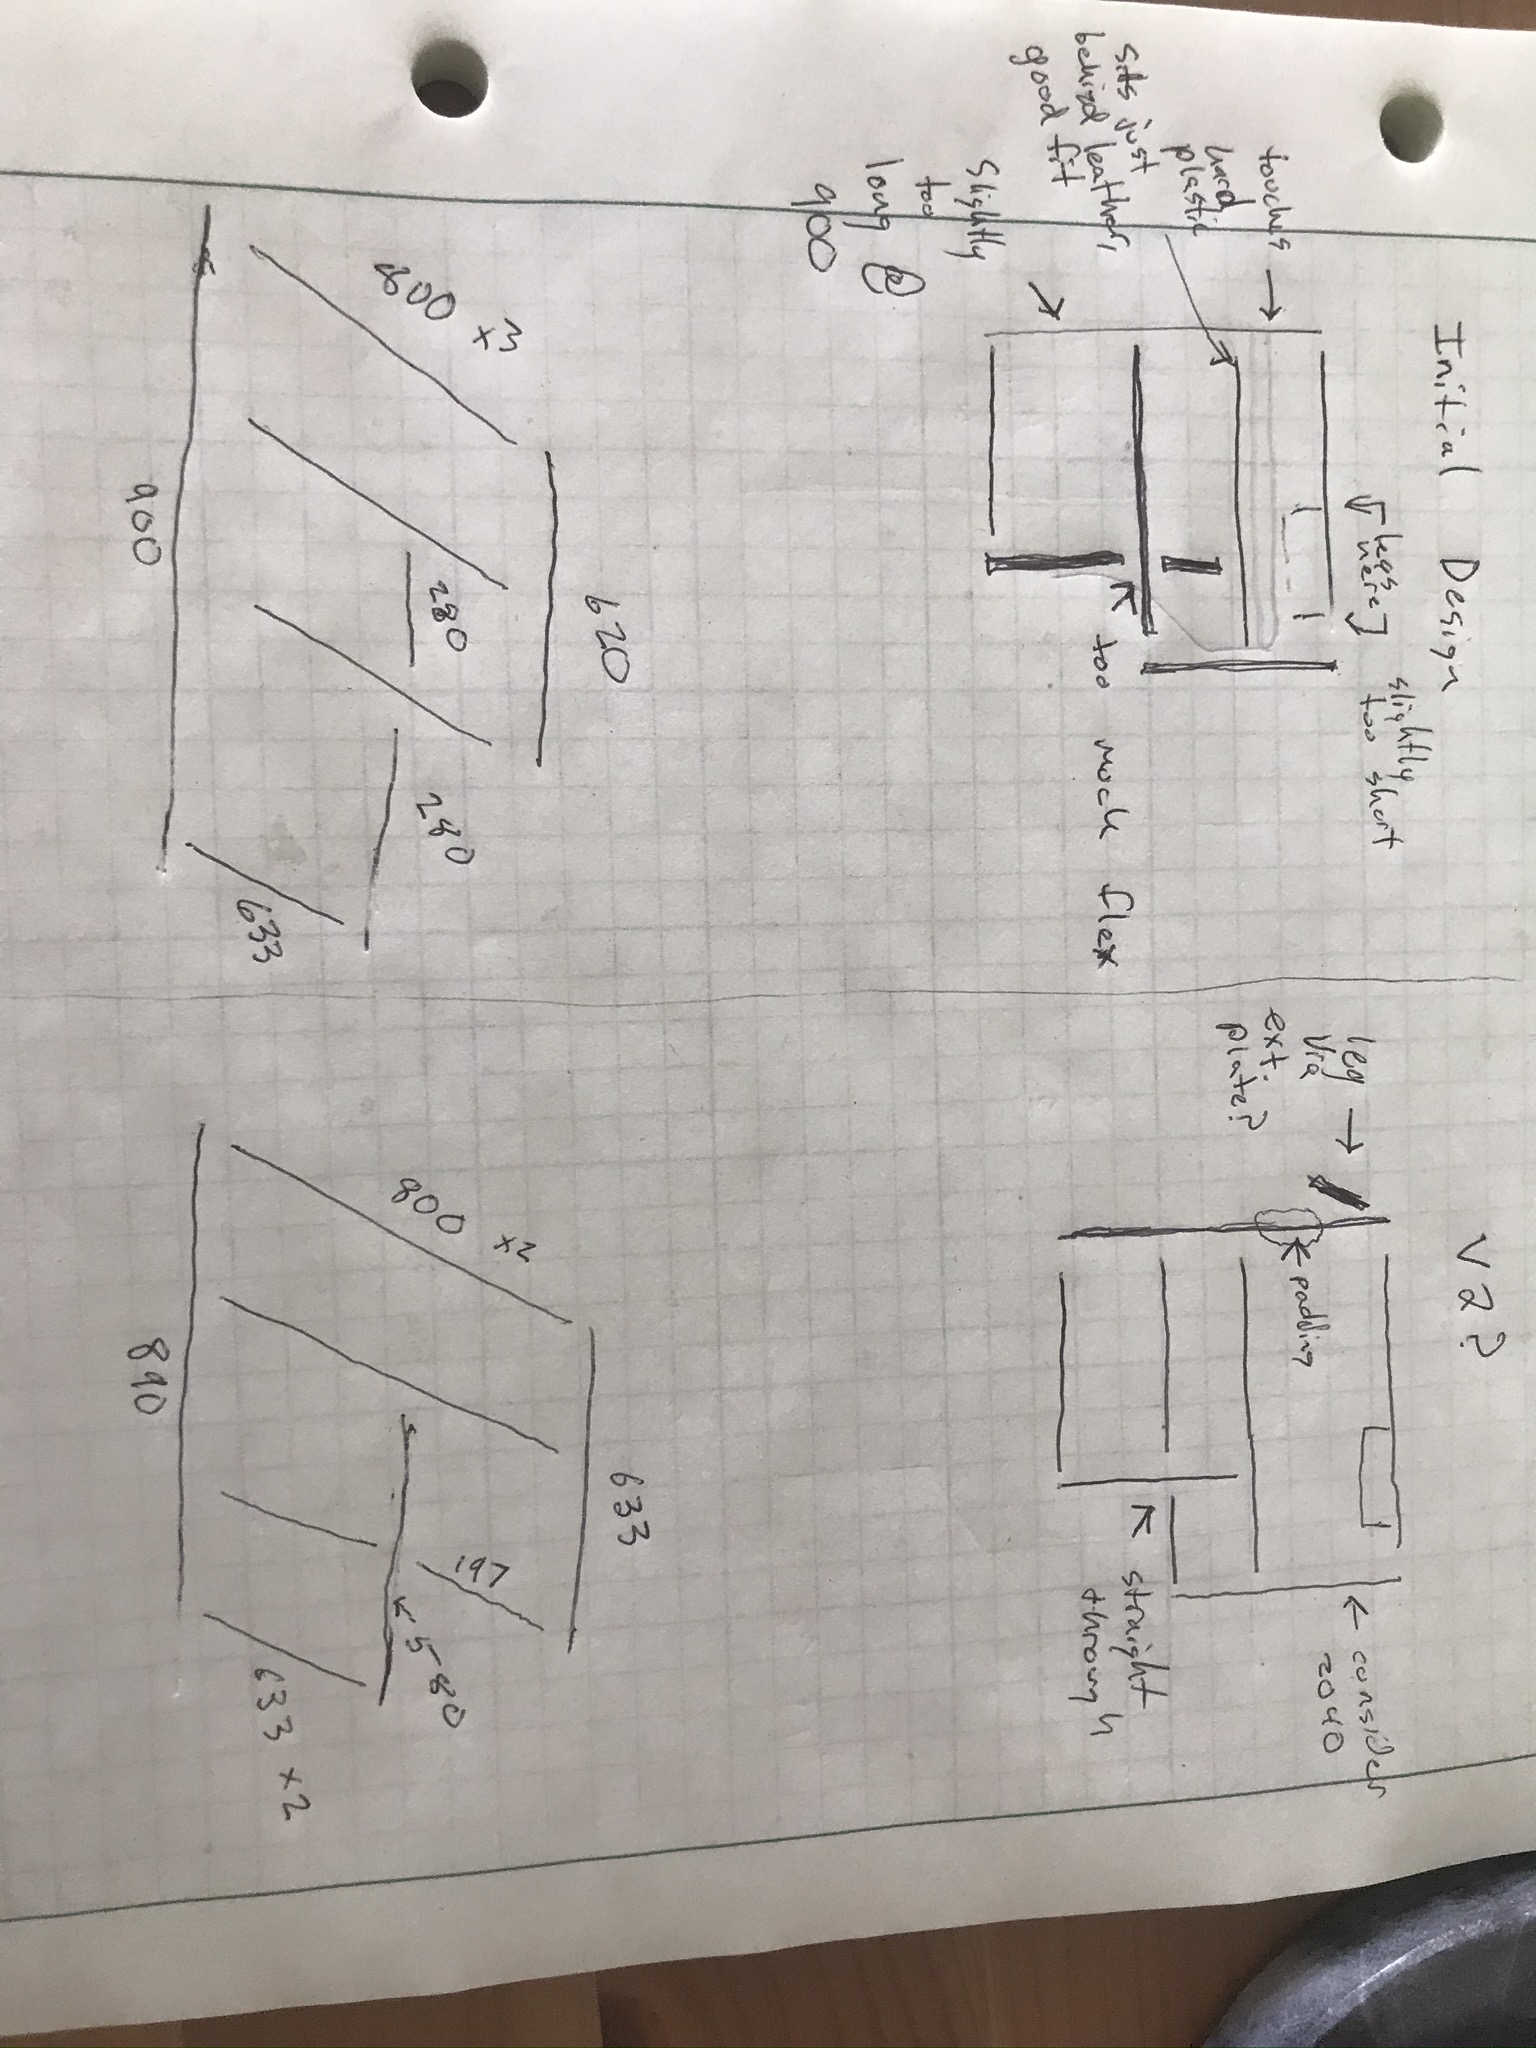 Note: I have two versions here. v1 is what I put in my truck. v2 is what I'd do if I were to start over again.
v2 would improve the rigidity of the front section and allow repositioning of the support legs.
v2 also has a slightly shorter front section to make it easier to install.
Here's a Google Spreadsheet Bill of Materials
The design is two-piece, for ease of install/removal. Each section is carryable by one person.
The rear section can remain in place with the seats up. It should be tied into the cargo rings or suitable anchor points.
This design still isn't perfect. Some known issues:
Note: I have two versions here. v1 is what I put in my truck. v2 is what I'd do if I were to start over again.
v2 would improve the rigidity of the front section and allow repositioning of the support legs.
v2 also has a slightly shorter front section to make it easier to install.
Here's a Google Spreadsheet Bill of Materials
The design is two-piece, for ease of install/removal. Each section is carryable by one person.
The rear section can remain in place with the seats up. It should be tied into the cargo rings or suitable anchor points.
This design still isn't perfect. Some known issues:
 Q and A:
Why Aluminum Extrusion?
I'm currently stuck in an apartment away from most of my tools.
I could draw this up and have the parts delivered already cut to size.
Plus, I think there's weight and volume savings to be had.
Why Underlay?
It was super-cheap and super thin. The largest span is about 12", so we don't need something so thick and heavy as 3/4"
For some reason, despite what it's sold as, this stuff has a very smooth and well-sanded surface.
If you've built a better version of this, I'd enjoy hearing about it.
Q and A:
Why Aluminum Extrusion?
I'm currently stuck in an apartment away from most of my tools.
I could draw this up and have the parts delivered already cut to size.
Plus, I think there's weight and volume savings to be had.
Why Underlay?
It was super-cheap and super thin. The largest span is about 12", so we don't need something so thick and heavy as 3/4"
For some reason, despite what it's sold as, this stuff has a very smooth and well-sanded surface.
If you've built a better version of this, I'd enjoy hearing about it.
Note: I have two versions here. v1 is what I put in my truck. v2 is what I'd do if I were to start over again.
v2 would improve the rigidity of the front section and allow repositioning of the support legs.
v2 also has a slightly shorter front section to make it easier to install.
Here's a Google Spreadsheet Bill of Materials
The design is two-piece, for ease of install/removal. Each section is carryable by one person.
The rear section can remain in place with the seats up. It should be tied into the cargo rings or suitable anchor points.
This design still isn't perfect. Some known issues:
- The tie-down arrangement is still weak.
- The attachment between the front and rear panels doesn't have much clearance to tigten or loosen bolts.
- Padding/Scratch protection in the design is non-existent or ad-hoc.
- The legs up front are not adjustable.
- Pool noodles or pipe insulation for surfaces that contact body work.
- Custom brackets to tie directly into the cargo ring mounting holes.
- Different connectors, or added feet, could allow for adjustment in the front legs, which would improve stability and ease of install.
- The front section could be better supported with a leg on the far outside of the seat, close to the seatbelt area.
- The 2040 sections in the rear are sized to allow drawer slides to be added, but I haven't drawn that up yet.
Q and A:
Why Aluminum Extrusion?
I'm currently stuck in an apartment away from most of my tools.
I could draw this up and have the parts delivered already cut to size.
Plus, I think there's weight and volume savings to be had.
Why Underlay?
It was super-cheap and super thin. The largest span is about 12", so we don't need something so thick and heavy as 3/4"
For some reason, despite what it's sold as, this stuff has a very smooth and well-sanded surface.
If you've built a better version of this, I'd enjoy hearing about it.
Above: The platfrom from the tailgate
Above: The platform widens in the 2nd row area
Above: The front section is supported by a U-shaped leg.
V2 adds an additional crossbar to allow repositioning of the legs.
Above: The rear section fits even with the 2nd row seat up.
In this photo, the seat is fully reclined.